
I sew. Sometimes I sew well, sometimes I don’t. It’s not that I don’t care. It’s more to do with my self-taught proficiency level.
Because of this, I find it challenging to follow tutorials to make finger cymbal mufflers, especially those that teach how to sew actual round ones.
And don’t get me started on crochet. Carolena Nericcio used to crochet when she taught classes at the old FatChanceBellyDance® studio. I have no idea how one does it.
With that backstory, sans the Carolena anecdote, I present to you probably the easiest way to muffle your finger cymbals, so you can practice at home without disturbing your loved ones, humans or animals.
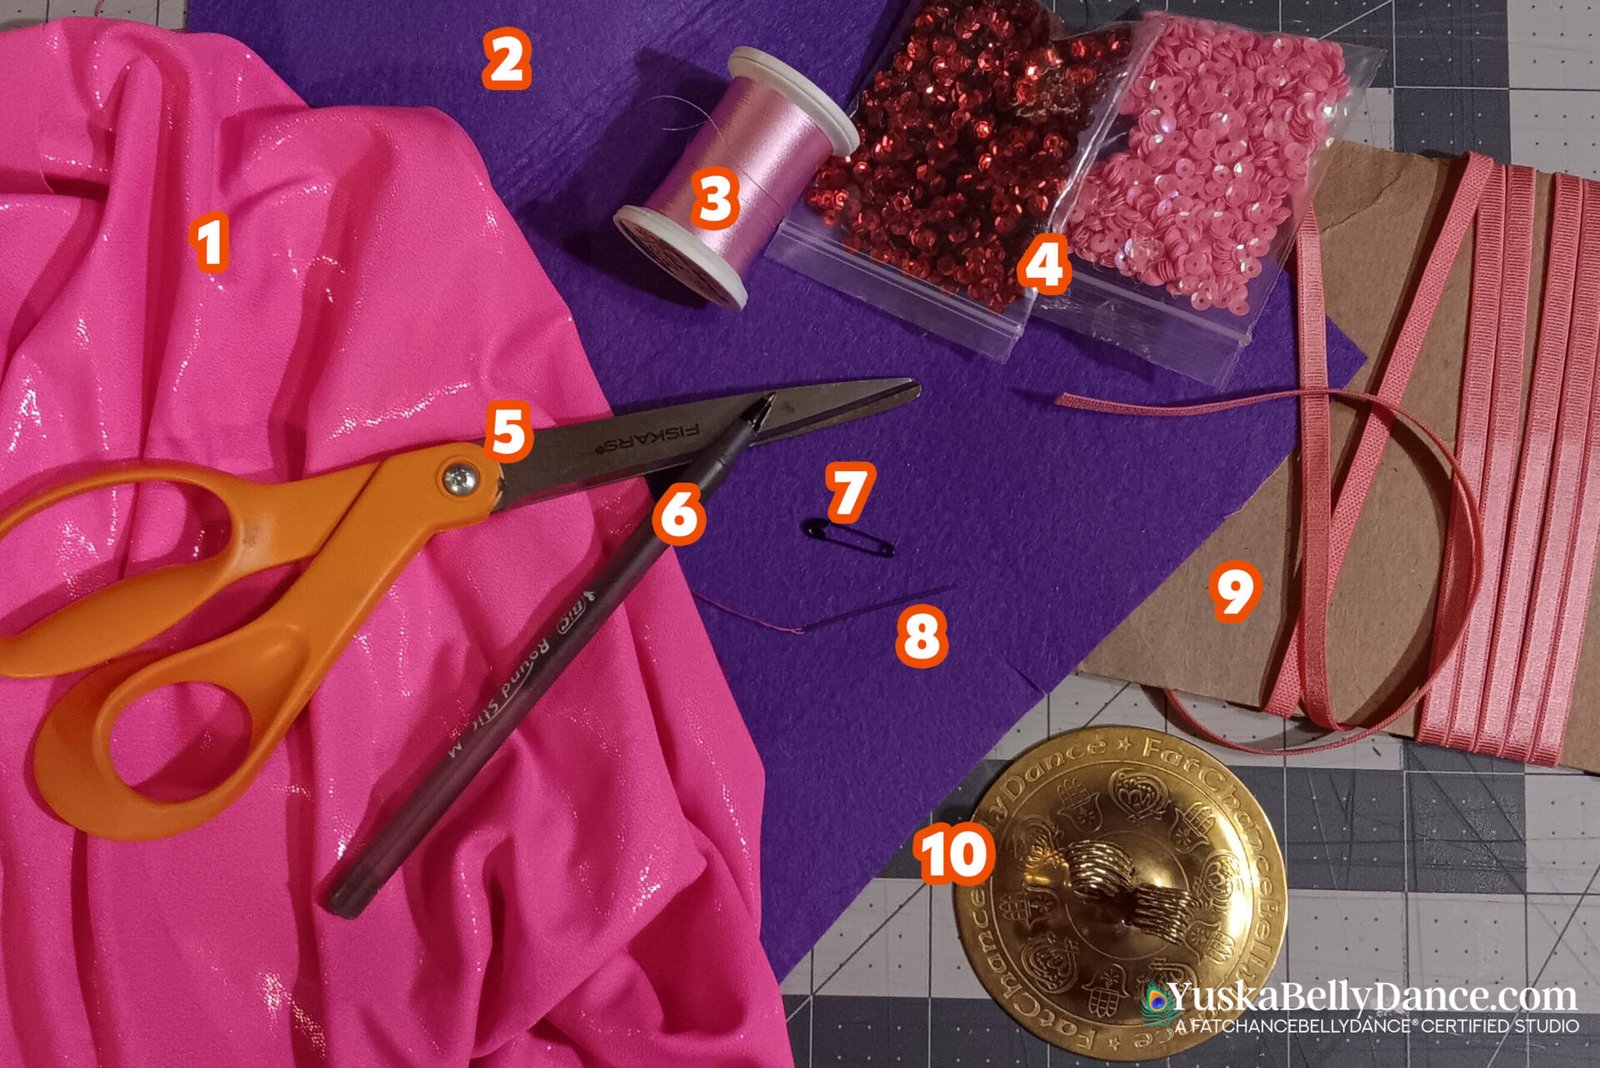
You’ll need:
- Fabric. Four-way stretch works best. It doesn’t fray, it’s forgiving, and it stretches.
- Felt fabric
- Thread
- Sequins
- Scissors
- Pen
- Safety pin
- Needle
- Thin and flat elastic band
- One of your finger cymbals

Use the pen to mark a square (in my case, squareish) on the fabric. The square should have margins about half the size of the finger cymbal. Cut out the square.
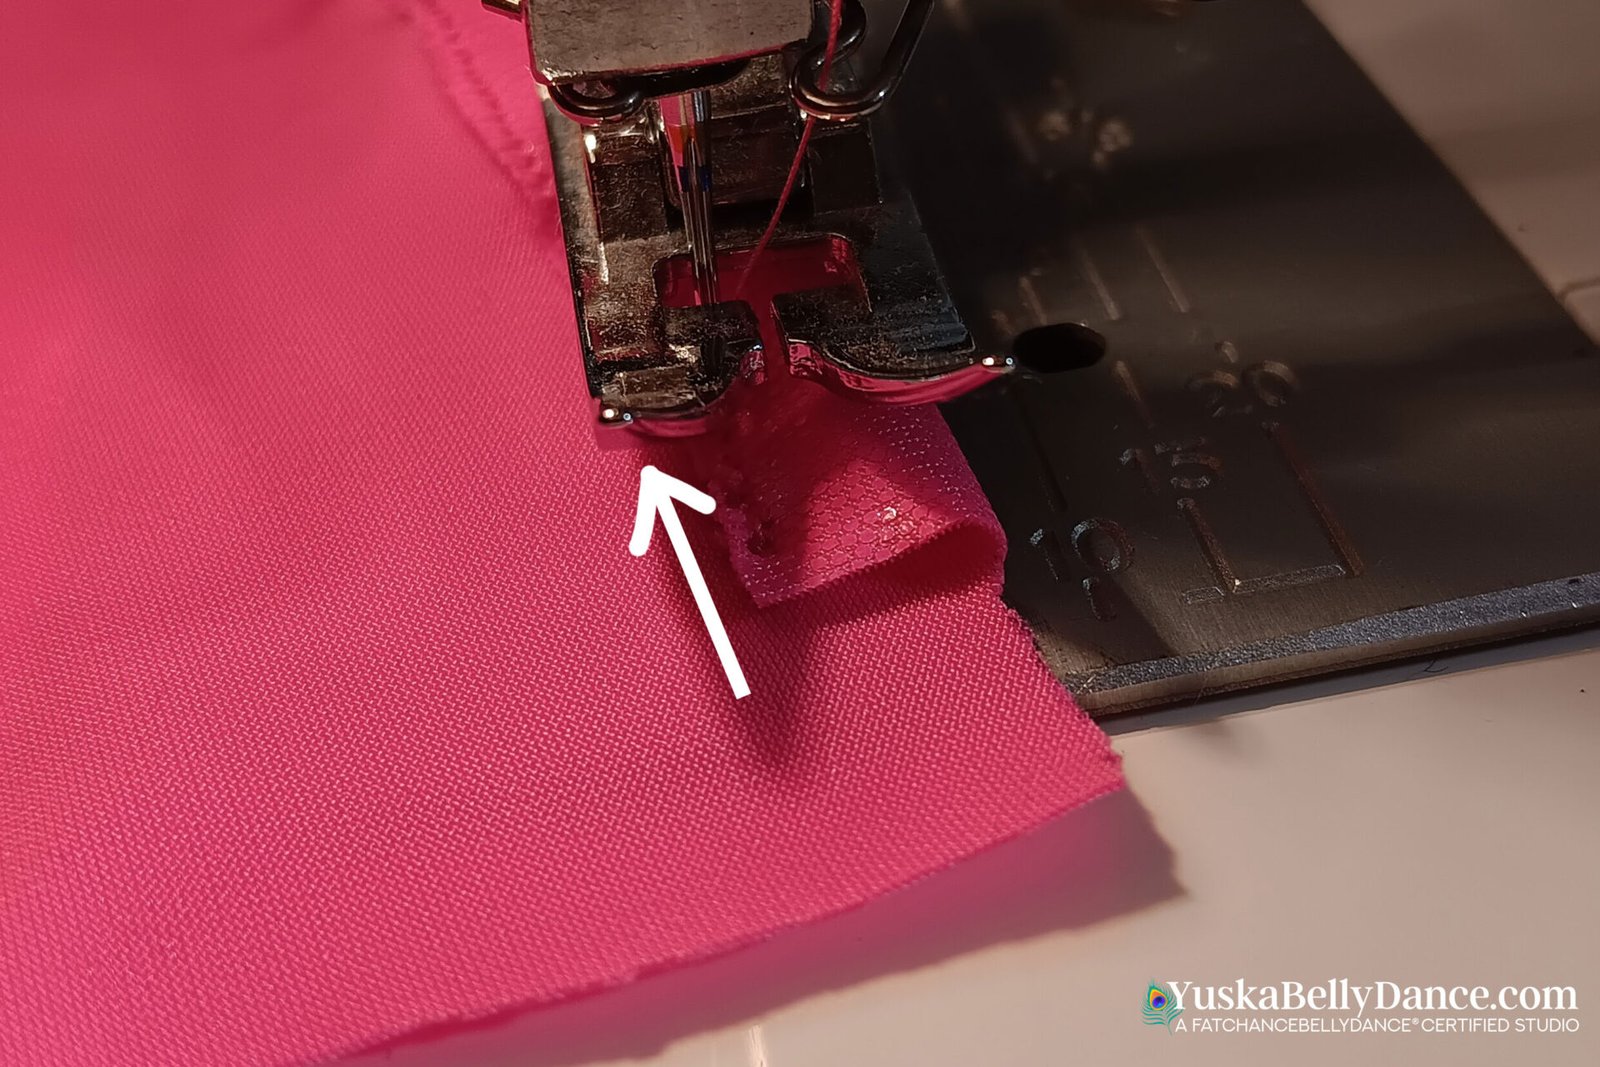
Take the square to your sewing machine (or a needle and thread) and start sewing one edge, leaving enough space to thread the thin elastic band through. It doesn’t matter which edge you start with.
Sew from one end to the other, and when you reach the other end, reverse the stitch just a bit. You’ll find out why.

Cut a tiny square at the corner, then fold the other edge and start sewing. Because we reverse the stitch, it should line up with the tip of the folded edge, with enough space to thread the elastic band through. Repeat cutting the corners (literally, and perhaps quite figuratively since it is a quick and dirty tutorial), the folding, and the sewing until you’re done with all edges.
You’ll get a square, well, a rectangle, with folded edges that form a tunnel for the elastic band, as marked by the white squiggly arrows. (And yes, I know this sample looks horrid. Again: it’s quick and dirty.)

Now, take your felt piece and trace around the finger cymbal. Cut out the round piece.
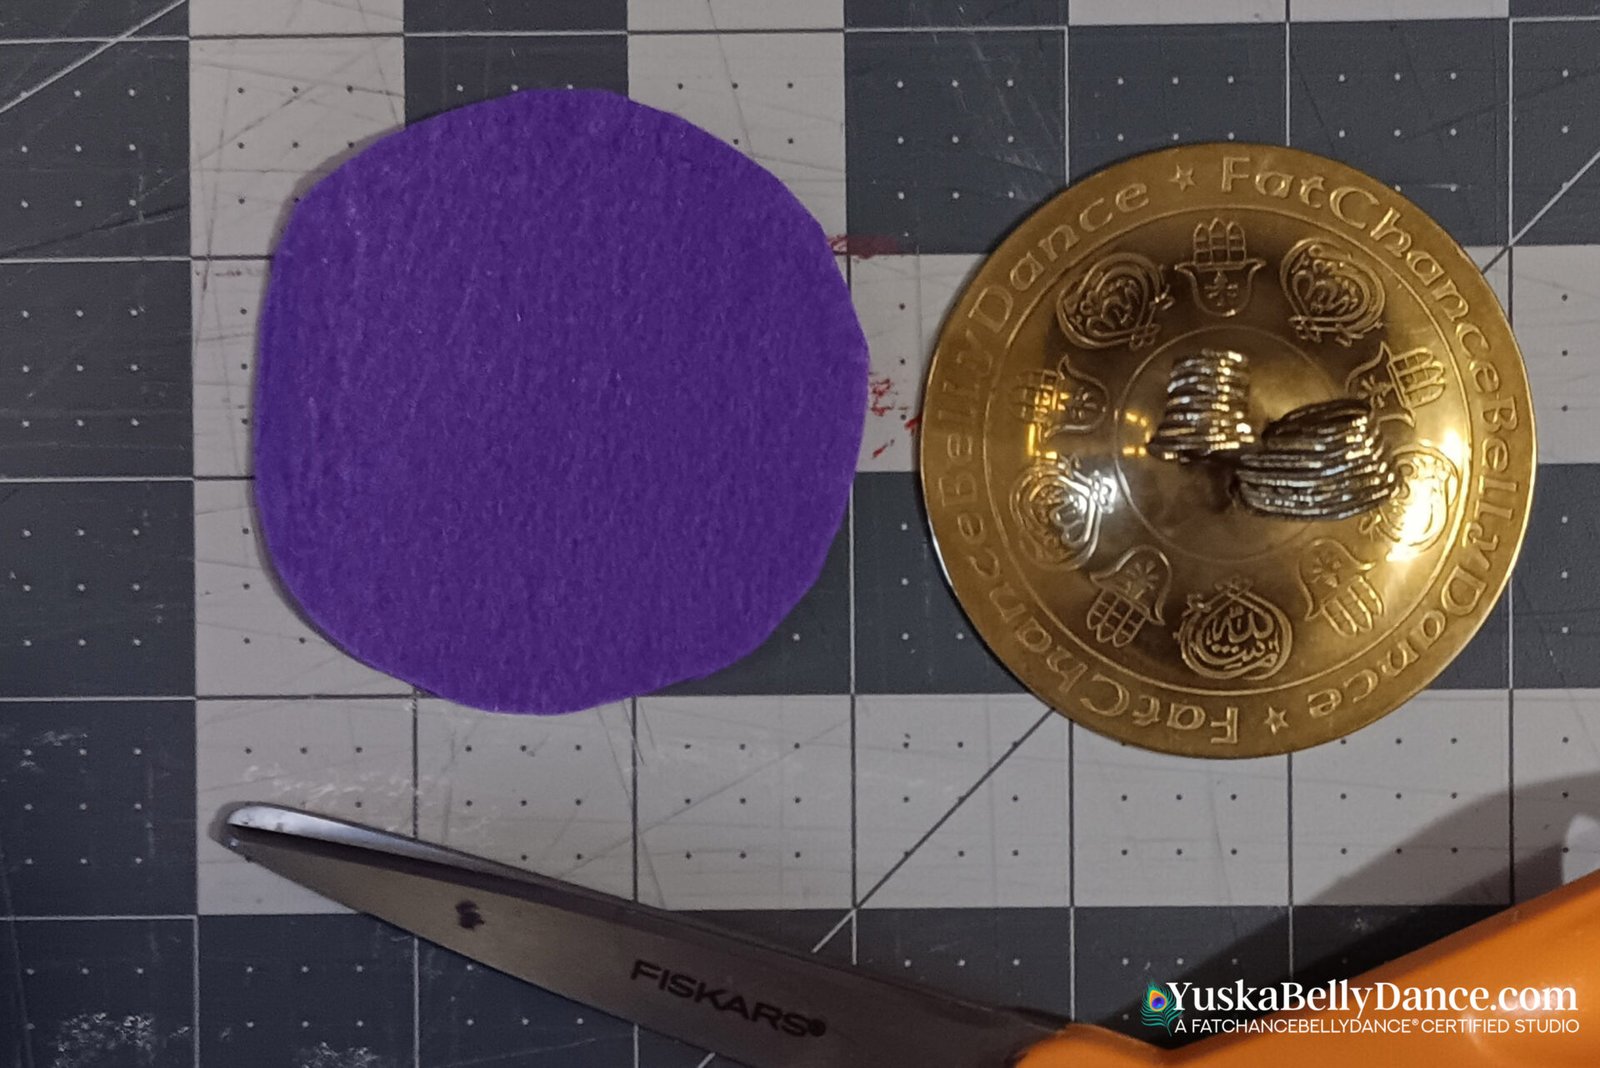
I use a single felt piece for every muffler. This is sufficient. But you can always double it up if you wish.
Put the round felt piece on top and in the center of the rectangular fabric. With your needle and thread or your sewing machine, stitch a mark to determine which finger the muffler belongs to. This is especially important if, like me, you put your finger marker (sequins) on the underside of the finger cymbals, not the top side.
I stitch “T” for “thumb” and “M” for “middle finger.” I then stitch one sequin for the thumb mufflers (and finger cymbals) and two for the middle finger mufflers (and finger cymbals). I use different colored sequins for each hand because my right and left thumbs, and right and left middle fingers, have slightly different sizes.

Stitching the sequins, the “T” or the “M” also helps secure the felt in its place so it doesn’t move around or pop out. And stitching just a tiny area in the middle keeps the stretchiness of the fabric.
The photo below shows the muffler with one red sequin and a “T” and the finger cymbal with one red sequin for my right thumb.

Now’s the time to feed the elastic band through the folded edges.
Secure the end of the elastic with a safety pin and start feeding it from one opening into the other, until the two ends meet.

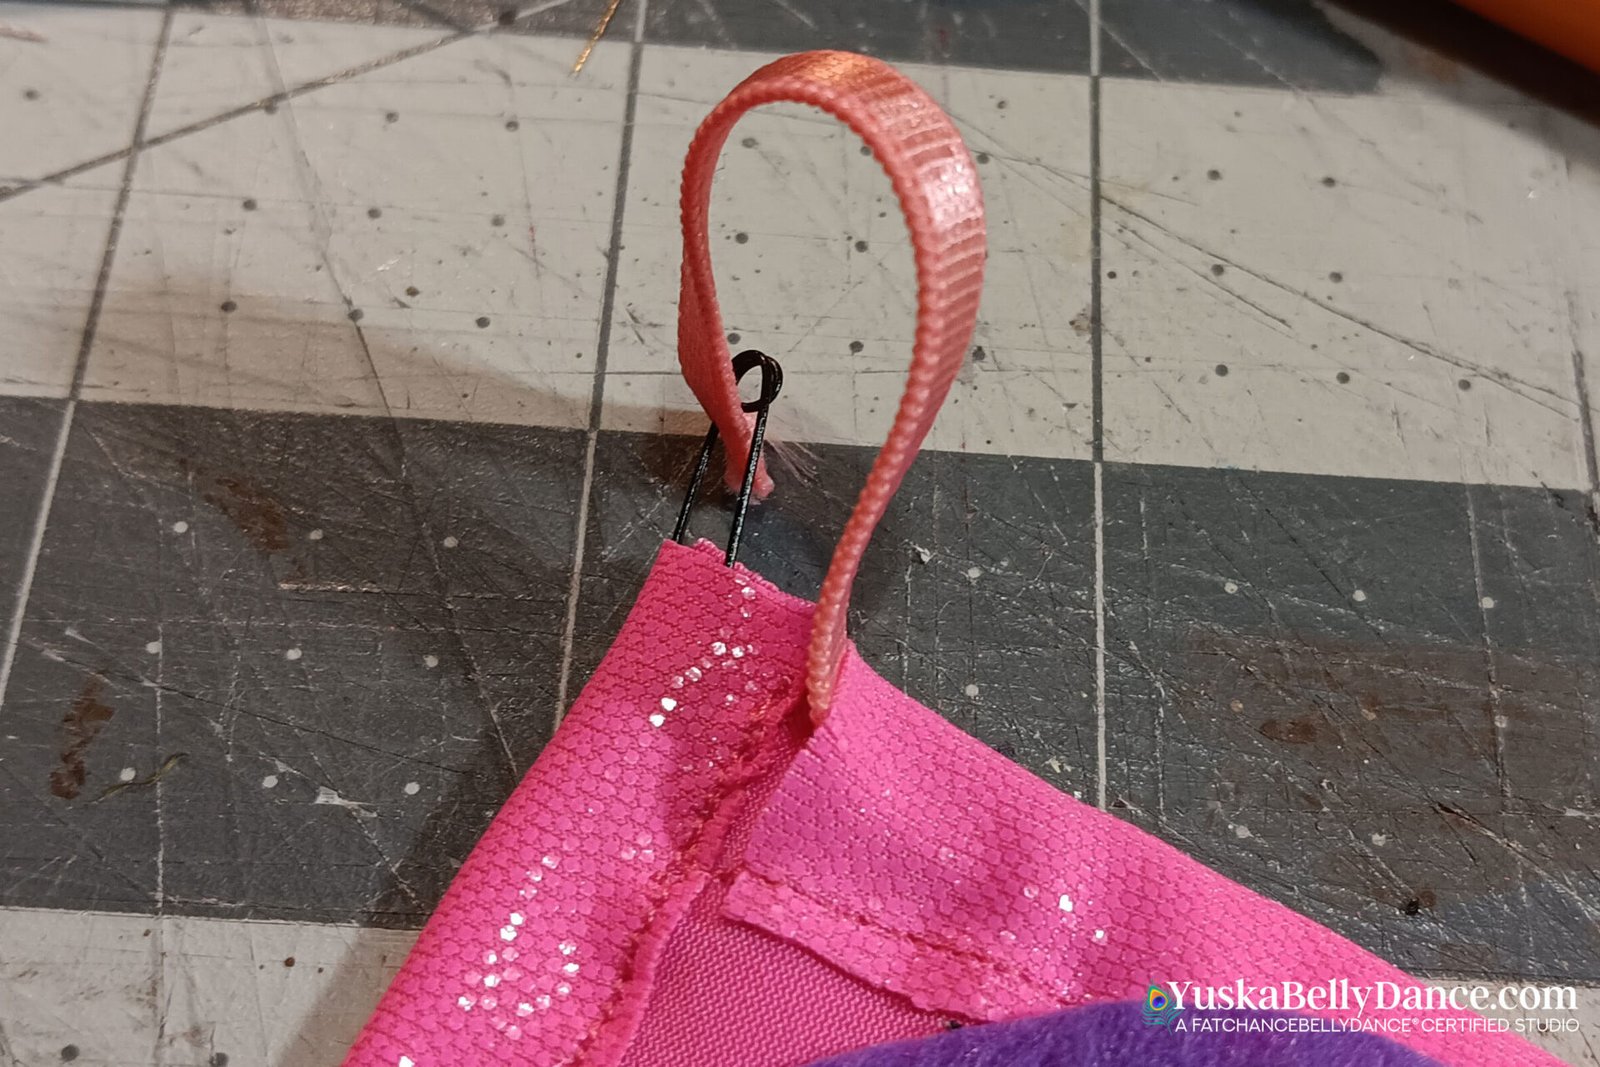

Once both ends of the elastic band meet, pull them tight to gather the fabric. It will start to turn into a round bowl shape.
Adjust the length of the elastic band so that the muffler fits snugly around your finger cymbal. Sew, then readjust and resew if necessary.
Once you’re happy, wiggle the elastic band so the seamline is hidden inside the fold. This may not be necessary since it won’t be visible anyway because of how gathered the folded edges are.

And there you have it!
The opening will look rectangular since the base fabric is rectangular. But it’s quick and dirty and easy (even for me). I’m sure you can do a better job with the stitches than I did with mine.
Each muffler has a sequin (or two) in corresponding color and quantity to the finger cymbals, so you can quickly put your cymbals on the correct fingers even with the mufflers on.
The stretchiness of the fabric and the length of the elastic band allow the muffler to also house other finger cymbals in different sizes. The shorter the elastic band, the smaller the opening will be. Here are the mufflers used on the Saroyan FatChanceBellyDance® and the smaller King Tutankhamun.

I hope the tutorial is clear enough. Now go and practice your finger cymbals!
Oh, and click here if you want to learn how to do the Bunny Loop.

Yuska is a certified FCBD® Style instructor whose dance journey spans Jakarta, Tokyo, and the San Francisco Bay Area. After training at FatChanceBellyDance®’s home studio, he now brings his passion for group improvisation, technical precision, and dancing in conversation to the greater Los Angeles area.
Further Resources:

The Bunny Loop: A Different Way to Tie Your Finger Cymbals
This rabbit-ear loop is stays on securely, but is easy to get on and off, perfect for those who like to clean their cymbals frequently.
Read more
Polishing and Cleaning Your Finger Cymbals
Think of it like treating your trusted set of finger cymbals to a fabulous spa day, complete with a chemical peel, a fizzy bath, and an all-over scrub.
Read more
An Interview with Carolena Nericcio
A reprint of the five-part series, originally published in 2011 on my dance blog, PinkCoinBelt Chronicles.
Read more